Showing posts with label tips and tricks. Show all posts

Saturday, December 28, 2013

Project StinkBug: Grime Time

In my spare time the past few weeks, I've been completing a pretty nasty task: cleaning and refinishing the undercarriage. By the looks of things, the undercarriage was completely original, and with a (pre-PCV system) draft tube venting engine oil vapor below the car, it was a grimy mess.

I had started cleaning things by the time this photo was taken, but the frame and floors were caked with dirt and grime.

After hours of work with a simple paint scraper and a Harbor Freight angle grinder using two wire wheel attachments, I could see bare steel with remnants of the original red oxide primer (by now a chocolate color). In the upper left, you can see the floor before I removed the grime.

Fast forward at least 20 hours of filthy work under the car, and three cans of Seymour red oxide primer, and I ended up with this...
and this...

and this...

and this. I used some simple Rustoleum Satin black spray paint on the frame, after cleaning thoroughly with 3M adhesive spray cleaner. (The front floors are a bit "drafty" — so some metal replacement is in the near future.) I also replaced the rotted body mount cushions with some black Energy Suspension pieces. And coated certain areas with 3M undercoating as original.
I used the opportunity to clean up the rear axle and rear suspension pieces. I used cast coat grey and satin and semi-gloss black where called for in the manuals for an original-style restoration.


I'm mostly done with the rear axle here, except for the rear brake cable, which is in the tumbler.

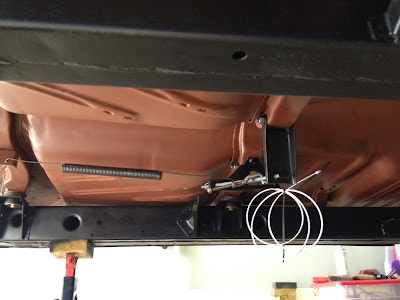
Here's the brake cable in the Harbor Freight tumbler before I poured in the glass beads and liquid degreaser. (Took a couple years before I found out that you add water or degreaser to the tumbler basin or it won't clean anything...) It comes out clean, and then I hose off and spray can clear it when dry.

And ready to go under the car. I was exhausted at this point and didn't realize it wouldn't roll under the car, which was on jackstands sitting too low... lol


Mentioned in this post:


Friday, January 18, 2013

Back in Black

Recently, I decided to change up the appearance of the '66. I didn't want to spend a lot of money on it though. I wanted to do some side stripes and wanted to change the look of the wheels. Ultimately, I added vinyl black side stripes and painted the wheel centers gloss black.

For the stripes I went with side stripes for a '67-'68. I wanted taller stripes and not the thinner GT-style stripes from '65-'66. I bought these from one of the mail order places for only $20. When I installed them I didn't wrap them around the edges of the panels, trimming them about 1/8" away instead. On the front fenders, I trimmed the stripe at the beginning of the wheel arch rather than up to the edge of the wheelwell itself.

To paint the wheels I bought a can of Rustoleum gloss black paint (to supplement a partial can I had on hand.) My Vintage Wheel Works wheels have coarse aluminum centers, but I had already added some silver paint a few years ago, since they had taken on a gold-tone over the years.

Ready for paint: I bagged each wheel and covered each lug hole with a coin. When taping the wheels I simply trimmed the edges with the edge of a razor blade—and did not have to follow the circular edges with dozens of pieces of tape around the wheel.
Side 2: In addition to cleaning the wheel before paint, I used a red Scotchbrite pad to scuff the surface to allow the new paint to adhere properly.
Three coats later...
Ready for the car...

Black stripes and black wheels installed. :)


Mentioned in this post:


Saturday, January 22, 2011

Tips & Tricks

I've been meaning to add some tips that I either found online or figured out as I went along with recent work. Here are two:

(1) When removing a harmonic balancer you can put the crank pulley bolts back into the balancer and then put a pry bar between them to hold the balancer still. Then loosen and remove the large balancer center bolt with a large breaker bar.

This procedure works well, but hopefully the bolt is not rusted
or seized into the crank snout.

(2) There are a number of ways to keep track of water pump bolts when replacing the water pump, but the best solution I found was to find a water pump template online and print it out. :-) I wish I could find the template I used so I could link to it, and give credit, but I can't find it...

I used the template at left to hold the stock bolts.
The template at right holds the new ARP bolts I am using instead.
Both paper templates are taped to a cardboard box to hold the bolts easily.