Over the past couple months I've been focusing on Project StinkBug, trying to move forward on three fronts: powertrain, underside, and prep/paint of recently acquired body pieces (hood, trunklid, etc.)
This update will explain the engine portion of the powertrain upgrade.
 |
| The original 283 looked like the heads were rebuilt before putting the car away 20 years ago. But I could see the short block was old and tired with mirrored cylinder walls and .060 over pistons already, limiting my rebuild options. |
 |
| I found a buddy to help me out at this point in the StinkBug project. Josh has the knowledge and facilities that complement my own. He removed the engine in his home shop and found the block in need of cylinder sleeves. But the cost would be prohibitive... |
 |
| Hmmm... A brand new GM motor for $1500 shipped. And with a three-year warranty. I figured it would perform better than a rebuilt 283, for almost half the price. (I won't achieve the 260hp/350tq rating with this combo running vintage parts.) |
 |
| A week later, the new 350 shows up at Josh's home shop. In keeping with the "classic" theme of the car, I wanted this motor to look like a 283 from '57, even if I had to give up some performance. |
 |
| A red 3M pad to scuff the black engine, and a can of orange engine paint, gets things rolling in the right direction quickly. |
 |
| The '57 Power Pack intake with oil fill tube installed. New short water pump (painted orange) installed as well. |
 |
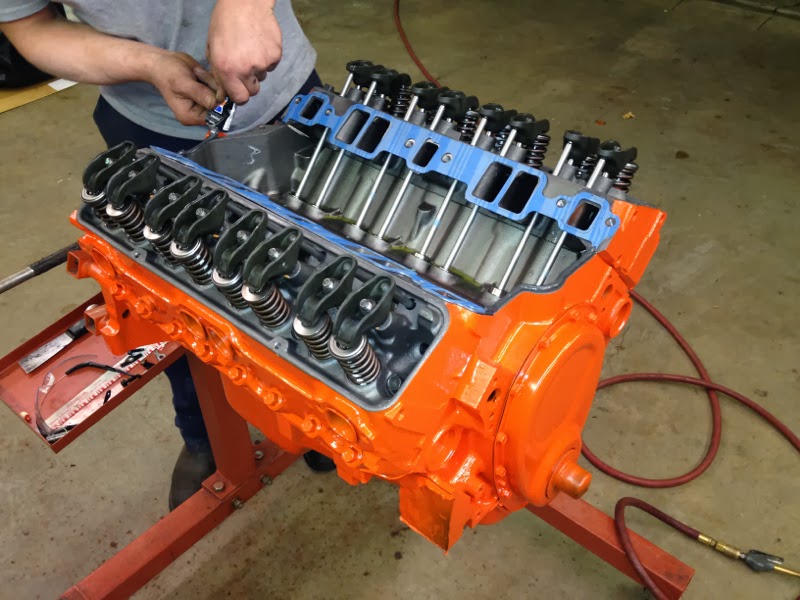
| These '57 valve covers are way too neat to leave behind. I painted them orange and added a silver Chevrolet script over the raised letters with a stencil kit. |
 |
| At this point, the rest of the new or refurbished items were added: the original rams horns exhaust manifolds, original generator with new brushes, new Blaster 2 coil painted black (with tilted coil stand for larger 4-barrel air cleaner), original distributor (with Pertronix conversion), original fan, water pump pulley, and fresh NOS Delco ignition components. That's the '57 Carter carb from Craigslist on top. We also added a slim 6" $60 PowerForce balancer and $30 steel crankshaft pulley, to replace the riveted stock pieces. These fit like stock while keeping the new fan belt in alignment. |
I'm really happy with the progress so far. There are some bosses and casting stamps and a late-model timing tab on the new motor that look out of place for the 1950s of course, not to mention the side motor mount attachment points (which I won't be using). But overall I think this new engine will stay true to the look I was going for and with a sensible price tag. I really like reusing vintage parts where it makes sense too.
Mentioned in this post: