Showing posts with label primer. Show all posts

Saturday, December 28, 2013

Project StinkBug: Grime Time

In my spare time the past few weeks, I've been completing a pretty nasty task: cleaning and refinishing the undercarriage. By the looks of things, the undercarriage was completely original, and with a (pre-PCV system) draft tube venting engine oil vapor below the car, it was a grimy mess.

I had started cleaning things by the time this photo was taken, but the frame and floors were caked with dirt and grime.

After hours of work with a simple paint scraper and a Harbor Freight angle grinder using two wire wheel attachments, I could see bare steel with remnants of the original red oxide primer (by now a chocolate color). In the upper left, you can see the floor before I removed the grime.

Fast forward at least 20 hours of filthy work under the car, and three cans of Seymour red oxide primer, and I ended up with this...
and this...

and this...

and this. I used some simple Rustoleum Satin black spray paint on the frame, after cleaning thoroughly with 3M adhesive spray cleaner. (The front floors are a bit "drafty" — so some metal replacement is in the near future.) I also replaced the rotted body mount cushions with some black Energy Suspension pieces. And coated certain areas with 3M undercoating as original.
I used the opportunity to clean up the rear axle and rear suspension pieces. I used cast coat grey and satin and semi-gloss black where called for in the manuals for an original-style restoration.


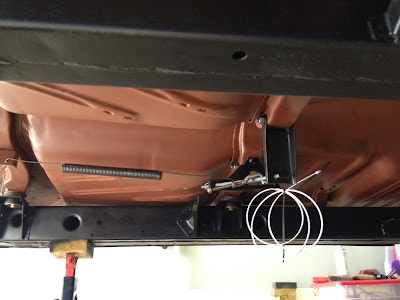
I'm mostly done with the rear axle here, except for the rear brake cable, which is in the tumbler.

Here's the brake cable in the Harbor Freight tumbler before I poured in the glass beads and liquid degreaser. (Took a couple years before I found out that you add water or degreaser to the tumbler basin or it won't clean anything...) It comes out clean, and then I hose off and spray can clear it when dry.

And ready to go under the car. I was exhausted at this point and didn't realize it wouldn't roll under the car, which was on jackstands sitting too low... lol


Mentioned in this post:


Tuesday, January 8, 2008

Wet Sanding Begins...


In the interest of keeping the job moving and keeping the cost down a bit, I decided to wetsand some of the bits and pieces from the car. The items at left took about 4 hours to wetsand with 400 grit paper. The rest of the car and other pieces need the same treatment here very soon.

Wednesday, December 19, 2007

Final Primer Time!

Mike put down four coats of final primer last night on the shell and the doors.

Before the primer went down, the yellowish epoxy sealer is visible around all the seams to keep moisture (rust) out.


When the primer is glossy before it dries, you can see how straight the panels are looking. Nice!


The extra pieces and doors and trunk and hood will get primed today.


Then everything gets wet sanded before the color coat begins.

The last photo shows Mike spraying the all-important cowl area in the new paint booth.


Sunday, December 2, 2007

Epoxy Primed After Metal Work


The back half was epoxy primed after the metal work and body work were complete. The painters are using a Dupont paint system with Rage filler to lightly smooth where needed.

The green wheelwells are actually etch primed after getting them down to bare metal with a high-speed wire wheel (not the one in the photo). A thick coat of 3M rubberized undercoating will be sprayed in them to deaden sound and protect the metal.

I took the various exterior bits and pieces down to bare metal myself. This includes the front and rear valances, the rear trunk extensions, the front headlight extensions and bezels, gravel guard, and stone deflector. It felt good to save these original Ford pieces with some work.